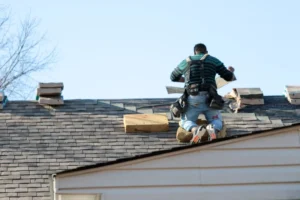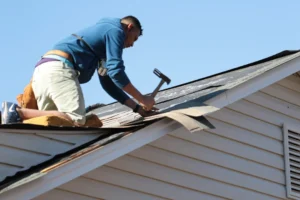


Getting a new roof is a big project, even when the actual installation takes only a few days. You may hear trucks arrive early, see a dumpster in your driveway, and hear steady activity overhead. Knowing what happens next can make the experience easier to manage.
For homeowners in Wilmington, planning also means thinking about coastal weather. A clear morning can turn into a rainy afternoon, and wind or heavy rain may affect the crew’s schedule. Here is a realistic look at the roof replacement process, from the first appointment through the final walkthrough.
Before Day 1: Inspection, Estimate, and Scheduling
The work on your roof starts well before the installation crew arrives.
First, a roofer evaluates the existing roof and discusses the condition of the roofing materials. The inspection may include shingles or panels, flashing, roof penetrations, valleys, visible decking concerns, and attic ventilation where accessible.
If replacement is the right option, the next step is preparing an estimate and agreeing on the project details.
Your written estimate should explain:
- The roofing material and product selected.
- Whether the existing roof will be removed.
- Underlayment and other roofing components included.
- Flashing and ventilation work.
- How damaged roof decking will be handled if discovered.
- Debris removal and cleanup.
- The expected schedule and payment terms.
You should also confirm the material color, delivery arrangements, access to the property, and where equipment will be placed.
In Wilmington, ask about permit requirements before scheduling. The City of Wilmington directs building permit applicants to New Hanover County’s Department of Permits and Inspections. Homes in local historic districts or overlay districts may also need a Certificate of Appropriateness for exterior alterations. Check the requirements for your specific property before work begins.
Day 1: Property Protection and Removal of the Old Roof
The first installation day is usually the loudest and busiest.
The crew arrives, unloads equipment, sets up ladders, and prepares the work area. Before removing roofing materials, the team should take steps to protect the property.
Protecting your home and yard
Depending on the layout, this may include placing protective tarps around landscaping, covering vulnerable areas, and planning where old roofing materials will be collected.
A dumpster or dump trailer may be positioned near the home. If it needs to sit on the driveway, discuss its placement with the contractor beforehand.
The crew also needs safe access to the roof and enough room to move materials.
Removing the existing roofing
The tear-off process involves removing the old shingles or other roofing material, along with the underlayment and components that need replacement.
This exposes the roof deck, which is the wood surface supporting the roofing system.
You should expect:
- Hammering and scraping sounds.
- Workers moving around the roof.
- Roofing debris being moved into a dumpster.
- Equipment and materials around the property.
- More noise than during a normal home repair.
If you work from home, have young children, or have pets that react to loud sounds, plan ahead. You may prefer to work somewhere else during the noisiest part of the project.
Day 1 or Day 2: Roof Deck Inspection and Repairs
Once the old roofing material is removed, the contractor can inspect the exposed roof deck.
This is an important part of the replacement because the new roofing system needs a sound surface underneath it.
The roof deck may have hidden damage that was not visible during the original inspection. A small leak, long-term moisture exposure, or damaged flashing may have allowed water to reach the wood below.
What happens if damaged decking is found?
The crew checks for signs such as:
- Soft or weakened wood.
- Rot or moisture damage.
- Delaminated or deteriorated plywood.
- Areas that cannot properly hold roofing fasteners.
If damaged sections are found, they may need to be removed and replaced before installation continues.
This can change the project schedule and cost. That is why it is useful to discuss the decking replacement process before signing the contract. Ask how additional repairs will be documented and approved.
In coastal Wilmington, moisture deserves attention. Humid conditions, wind-driven rain, and leaks around roof penetrations can contribute to problems that remain hidden beneath shingles.
Do not treat a decking repair as an unnecessary delay. Installing new roofing over compromised wood can create problems later.
Day 1 or Day 2: Underlayment and Weather Protection
After the roof deck is ready, the crew begins installing the protective layers beneath the finished roofing material.
This stage is often called drying in the roof. The goal is to create a protective barrier before the new shingles or other roofing material are installed.
What is underlayment?
Underlayment is a protective layer installed over the roof deck and beneath the primary roofing material. It provides an additional line of defense against moisture.
Depending on the roofing system and installation requirements, the crew may install:
- Synthetic or other approved roof underlayment.
- Self-adhered membrane in specified vulnerable areas.
- Drip edge along roof edges.
- Valley protection where roof sections meet.
The exact materials and installation sequence depend on the roofing system and manufacturer instructions.
Why does this matter in Wilmington?
Wind-driven rain can reach vulnerable roof details during coastal storms. Properly installed underlayment, flashing, and edge components help manage water and protect the roof deck.
For homes around Wrightsville Beach, Carolina Beach, and other coastal areas, the installation details matter just as much as the visible roofing material.
Day 2: Installing the New Roofing Material
This is the stage when your home starts to look different.
For an asphalt-shingle replacement, the crew generally installs the new shingles in organized rows, following the manufacturer’s instructions for placement, fastening, and alignment.
The process includes more than simply covering the roof.
What the crew installs
Depending on the selected roofing system, the work may include:
- Starter shingles along the appropriate roof edges.
- Main shingle courses across the roof surface.
- Properly placed and fastened shingles.
- Ridge and hip components.
- Flashing around roof penetrations and transitions.
Each component has a purpose. Starter shingles help protect roof edges, while ridge caps cover the peak and hips. Correct fastening helps the roofing system perform as designed.
What if you choose metal roofing?
Metal roofing follows a different installation process. Panels, seams, fasteners, trim, and flashing details must be installed according to the selected system.
Standing seam metal roofing, for example, uses raised seams that connect adjacent panels. The installation schedule can differ from an asphalt-shingle project because panel layout, fabrication, roof geometry, and detailing all affect the work.
For that reason, do not assume every roof replacement will follow the same two-day schedule.
Day 2 or Day 3: Flashing, Ventilation, and Final Details
A roof is not complete when the main surface is covered. The smaller details help direct water away from vulnerable areas and allow the roofing system to function properly.
Flashing around vulnerable areas
Flashing is used where the roof meets walls, chimneys, valleys, skylights, and other structures or openings.
These transitions need careful attention because water can enter where roofing materials meet another surface.
A crew may install or replace flashing around:
- Plumbing vents.
- Chimneys.
- Skylights.
- Roof-to-wall connections.
- Valleys and other roof transitions.
If flashing is poorly installed or damaged, water may find its way beneath the roofing material.
Checking attic ventilation
Ventilation is another part of the roofing system to consider during replacement.
The roof design may include intake vents, exhaust vents, or a ridge vent. The correct arrangement depends on the home’s design and the ventilation requirements of the roofing system.
In Wilmington’s humid climate, proper attic ventilation and moisture management are important. A roof replacement is a good time to identify ventilation concerns rather than simply covering the old roof and ignoring them.
Harbor Roofing and Siding also provides attic ventilation installation and repair.
CTA BOX: Planning a Roof Replacement in Wilmington?
Know what your roof needs before installation begins. Call Harbor Roofing and Siding at (910) 262-5508 to request a free inspection and estimate.
Final Day: Cleanup, Inspection, and Walkthrough
The last stage is about checking the work and leaving the property in good condition.
Roof replacement creates debris. Old shingles, nails, packaging, and small pieces of roofing material can end up around the house during installation.
What should happen before the crew leaves?
A proper closeout should include:
- Removing leftover roofing debris.
- Collecting unused materials and equipment.
- Sweeping the driveway and accessible work areas.
- Using a magnetic sweeper to collect loose roofing nails.
- Checking roof edges, ridges, flashing, and visible details.
- Reviewing any outstanding items with the homeowner.
The magnetic sweep is especially important around driveways, walkways, lawns, and areas where children or pets may play. It helps collect loose metal fasteners that could otherwise remain on the ground.
Ask the contractor to explain what was completed and whether any follow-up work or inspection remains.
You should also receive the project paperwork, including the final invoice and applicable warranty documents.
How Long Does a Roof Replacement Take?
The timeline depends on the roof’s size, design, material, accessibility, and condition. A straightforward asphalt-shingle replacement may take one to three working days, but that is not a guaranteed schedule.
| Project factor | How it can affect the schedule |
|---|---|
| Roof size | Larger roofs generally require more installation time |
| Steep roof pitch | Requires additional safety measures and careful work |
| Multiple roof sections | Valleys, hips, and transitions add installation details |
| Existing roof layers | More material to remove can extend tear-off |
| Damaged decking | Hidden wood repairs add time |
| Roofing material | Metal, tile, and slate may require a different schedule |
| Weather | Rain and strong winds can pause work |
| Property access | Limited space can affect equipment and material handling |
A metal roof, tile roof, or slate roof may take longer than a standard asphalt-shingle replacement. The best way to get a realistic schedule is to have the contractor evaluate the actual roof and explain the expected work.
How to Prepare Your Home for Roof Replacement
A little preparation can make installation days easier for everyone.
Before the crew arrives, use this checklist:
- Move vehicles. Clear the driveway and any areas where the dumpster, trailer, or delivery vehicle may need access.
- Protect outdoor belongings. Move patio furniture, grills, decorations, and items near the house.
- Secure pets. Roofing noise and unfamiliar activity can make pets anxious.
- Protect attic storage. Cover belongings stored beneath the roof if dust or small debris may fall through gaps.
- Remove fragile wall decorations. Vibrations from roof work may affect items hanging inside the home.
- Confirm access. Make sure the crew knows where to park and which areas should remain clear.
- Discuss communication. Ask who will update you if hidden damage or weather changes affect the schedule.
For homes in neighborhoods such as Landfall or Figure Eight Island, also confirm any applicable community access, delivery, or exterior work requirements before the scheduled date.
What Can Delay a Roof Replacement?
A delay does not automatically mean something is wrong. Some conditions require the crew to stop rather than risk leaving the home exposed or installing materials in unsuitable conditions.
Common reasons include:
- Rain or an approaching storm.
- Strong winds that make roof work unsafe.
- Unexpected damage to the roof deck.
- Material delivery problems.
- Additional work around flashing or roof transitions.
- Permit or property approval requirements that have not been resolved.
Wilmington homeowners should pay particular attention to the forecast when scheduling work during storm season. A contractor may adjust the start date or pause installation if weather conditions are not suitable.
The important thing is communication. Ask how the roof will be protected if work has to stop before the replacement is complete.
Frequently Asked Questions
Can I stay home during a roof replacement?
In most cases, homeowners can remain inside while the work takes place. However, expect significant noise, vibration, and activity around the property. If you work from home or have pets that are sensitive to noise, consider making other arrangements for the busiest day.
Does the entire roof have to be removed before the new one goes on?
A full tear-off allows the contractor to inspect the roof deck and identify hidden damage. Whether removal of all existing layers is required or appropriate depends on the roof, local requirements, and the proposed roofing system. Ask your contractor to explain the planned method.
What happens if the roofer finds rotten wood?
The damaged section may need to be removed and replaced before the new roofing material is installed. This can add time and cost, so ask how the contractor will document the damage and get approval for additional work.
Will my roof be protected if it rains during installation?
The crew should plan the work around the weather and protect exposed areas as the project progresses. If rain is expected, the contractor may delay work or secure the roof before leaving. Ask about the weather protection plan before installation starts.
Do roofers need to come inside my home?
Most roof replacement work takes place outside. A contractor may need interior or attic access if ventilation, moisture, or a specific structural concern needs to be checked.
Is a roof replacement completed in one day?
Some straightforward projects may be completed in one working day, while others take two or more days. Roof size, pitch, material, hidden damage, and weather all affect the schedule.
CLOSING CTA BOX: Get Ready for Your New Roof
A smooth roof replacement starts with a clear plan, the right materials, and careful installation from the roof deck to the final cleanup. Harbor Roofing and Siding is a locally owned Wilmington team offering free roof inspections.
Call (910) 262-5508 to discuss your project or request an estimate.